One of the most marvelous and invaluable aspects of music is that it is not confined to the fine arts. Certainly, some of the most transcendent and evocative sounds are composed by brilliant minds, conveyed by highly-trained creatives on magnificent instruments crafted by deeply-skilled makers and produced by super-humans with unrivaled ears.
But at the end of the day, even the most unadorned incidents of simple noise-making can spark joy in the heart of any human, young or aged, humble or proud, contented or melancholy.
Children in particular have an uncanny ability to delight in peculiar sounds, steady rhythms, and simple melodic patterns. Those who are encouraged in these endeavors can grow to carry with them a deeply beneficial connection with music throughout their lives.
Indeed, my own musical journey began in my first years on earth, banging on the diaper box in accompaniment with my father’s lyrics. To this day, I play a mean rubber ducky. (We take music very seriously in my family.)
In short, even the most rudimentary of instruments can find a place in the music you make. The simple triangle still has a home in some of the most haute symphonies across the globe. Drums can be fashioned out of any item with depth and a membrane. (Though, it should be noted that the art of fine drum-making is by all accounts an astounding feat!)
And as adults, there’s no reason not to explore what kinds of sounds we can make with what’s lying around the house. Not only does it give new purpose to items that may have been tossed as trash — something we make entirely too much of already — but it sparks creativity in ourselves and any young, impressionable eyes and ears that might share our curiosity.
I encourage you to read on to discover the myriad of musical instruments you can make at home with recycled materials. You might be surprised at the quality …
Table of Contents
Making Homemade Instruments
Before diving in, it’s worth noting that some of these instruments are best suited for quality time with the kiddos, while some may indeed make it into your next recording or busking sesh. This is ultimately an all-ages compilation that benefits everyone, even the Earth!
Maracas
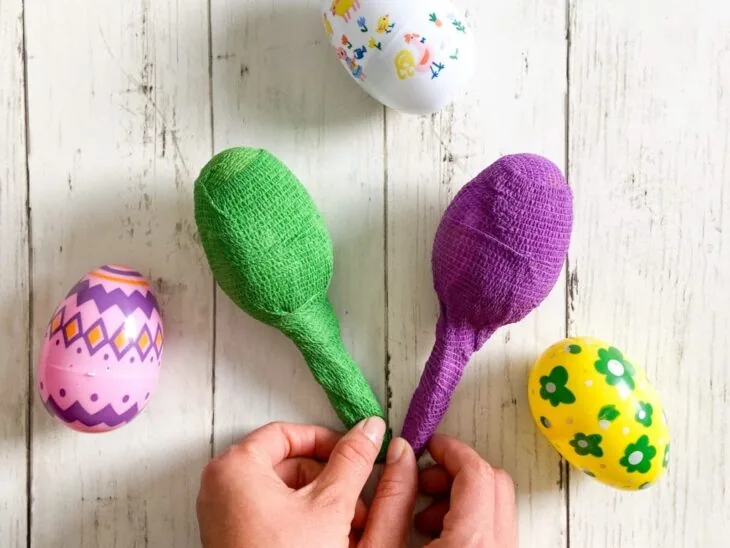
Where proper maracas are a work of art and lend a distinct, refined cadence to songs, we can craft decidedly improper maracas at home for a second-rate, endlessly-entertaining rattle-fest!
Supplies include: plastic eggs (like the ones that are super common around Easter), plastic spoons, tape (ideally, one you can draw on or decorate such as masking or painter’s tape), and filler.
Filler can be any small items you have laying around, such as rice, popcorn kernels, small beads, beans, or pebbles. Test out a few different kinds and see what strikes your fancy. Better yet, make a few different pairs of maracas for differing sounds!
Fill the plastic eggs with your noisemaker of choice and close them tightly. Then, cup the egg with two (clean) plastic spoons on either side and tape in place around the widest part of the egg, where the seam is. (This essentially makes a handle for your maraca.) Add more tape around the handles of the spoons for sturdiness.
Next, decorate as desired and shake to your heart’s content!
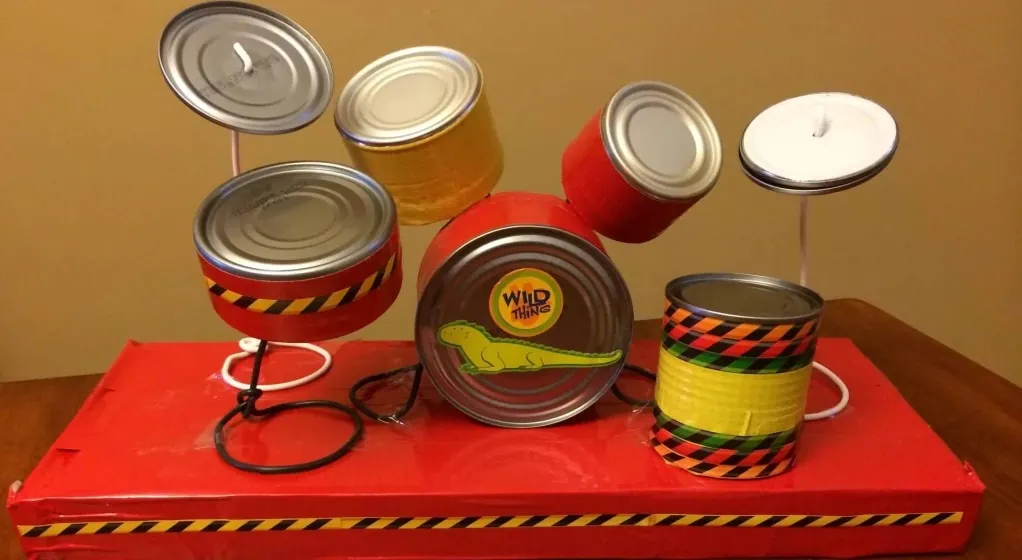
Food Can Drums
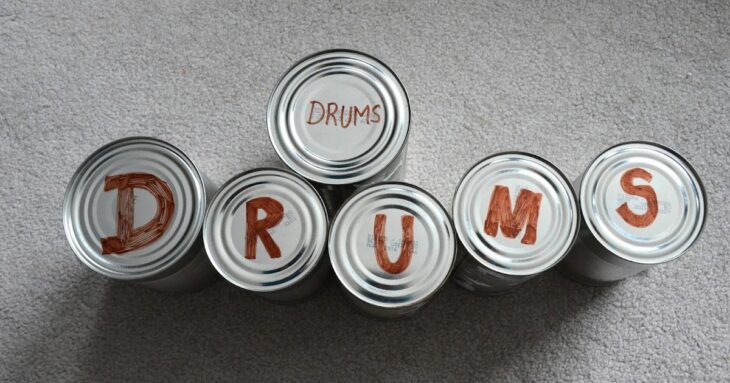
It may come as no surprise that empty food cans make great little drums. But they also double as miniature washboards thanks to their ribbed sides!
For this craft, gather the following supplies: empty food cans, a balloon for each can, scissors, and your choice of trim, such as ribbon, burlap, or satin. You may also need some craft glue for this project. And may as well have your decoration supplies handy, too.
Begin by washing and drying your cans. Then, dive right into the fun part by decorating them. Paint is a great place to start, and you can use the same trim as embellishments for your design; just note that you won’t be adding the official trim just yet. Any trim you use on the body of the can is purely aesthetic.
Next, cut a balloon just after the stem and towards the head where it starts to expand. Feel free to cut closer to the base to begin as you can always cut more later.
Stretch the balloon over the mouth of the can making as tight a fit as possible to create a taut membrane. It should stay in place on its own, but you can use craft glue here if the balloon is uncooperative.
Finally, use your craft glue to apply your trim around the seam where the balloon meets the can’s edge.
Fashion drumsticks out of pencils or paintbrushes (or any other thin stick you’ve got laying around), and let the drumming begin. Don’t forget that the sides make a great washboard sound!
Bonus: use different size cans to produce drums with different timbres!
Rain Stick
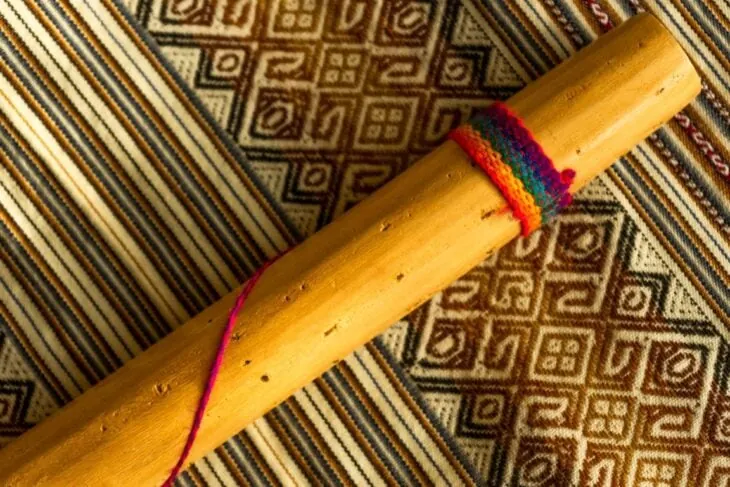
If done right, this homemade rain stick might just find a home in your permanent instrument corral.
Supplies needed are: a strong cardboard tube (such as a proper poster tube), hammer and small nails, filler (as with the maracas, these can be kernels, beans, rocks, or beads but rice may be too small), and art supplies for decoration.
When seeking out a suitable tube for this project, it is not advisable to resort to a paper towel roll or other similarly flimsy cardboard tubes. You will find several resources online that suggest using something thin; but for a really full-sounding rain stick, a stronger, longer tube works best.
Another benefit to poster tube is that it already has caps on the ends.
Similarly, give some thought to the nails that you choose. Make sure they’re not so long that they penetrate all the way through. Indeed, having nails poking out of your rain stick turns it into more of a weapon than a musical instrument!
Furthermore, the nails you use should be relatively thin as the goal is to slow down the filler when you turn the stick upside down but not so thick as to stop the filler entirely. And of course, the more you use, the slower the filler moves and the more drawn out the sound will be.
After you’ve hammered your nails into your tube, add the filler and cap the ends. Complete the project with whatever decoration you have in mind! If you find the nails unsightly, just wrap the stick in something like craft paper, paper bags, or even foil (if you want to get really outrageous).
Pan Pipe
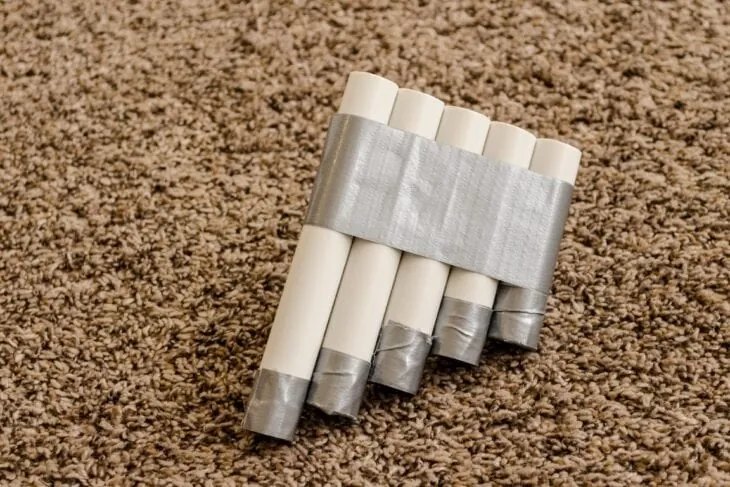
Not all homemade instruments have to be percussive. With some PVC and a saw, you can have a proper pan pipe (well, approximately) to add to the mix.
Half-inch pipe (which always seems to be leftover from various home projects) works best for this instrument. You will also need an appropriate pipe-cutting saw, plastic glue (such as Gorilla or super glue), some strong scissors, and the plastic lid from a decommissioned food storage container. The finished project looks great with a nice, embroidered trim and perhaps some beadwork.
Begin by cutting your pipe into varying lengths. Cut as many pipes as you like.
It is worth noting that you will find sources online that pinpoint specific pipe lengths to certain pitches. For example, they may suggest that a 5 ⅜” length (in half inch) will produce a D pitch. Approximately.
Next, you will be making the caps for each pipe. Take one pipe and trace the open end on your decommissioned storage container lid for as many caps as you need. Cut these with your strong scissors and glue one to the end of each pipe.
Take into consideration that the smoothest ends should be the open end, where you apply your lips. You can use your scissors, or sandpaper if you’ve got some laying around, to smooth out any super rough edges.
Finally, arrange your pipes in order from longest to shortest, open ends in line. Crafty-type folks may arrange decorative string to tightly hold the pipes together. The rest of us can simply glue them together, using craft sticks for stabilization if needed.
Decorate with trim, beads, tassels, charms or whatever strikes your fancy, and get piping!
Ankle Bells
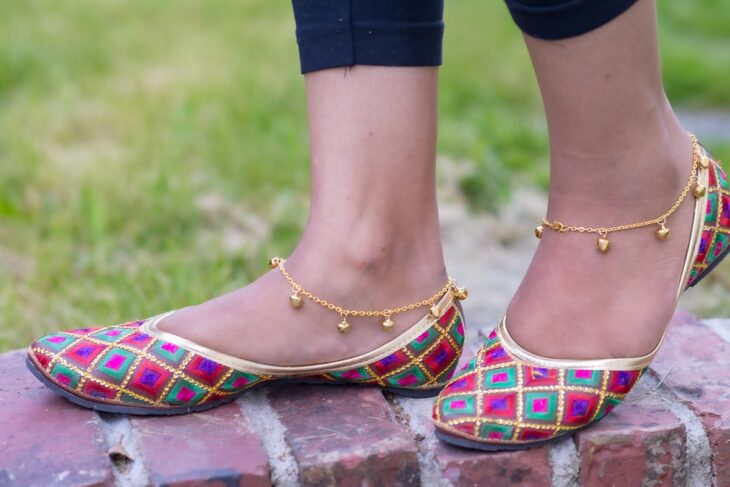
Ankle bells feature prominently in cultures across the globe, and there is no shortage of ways to craft your own. More advanced crafters may use chains or ropes, while others may enjoy knitting an artsy anklet on which to affix bells.
For the absolute simplest version of ankle bells, all you need is felt, a needle and thread, and some hook and loop fastener (think Velcro). And bells, of course!
Measure and cut a length of felt around the ankle, overlapping enough for the hook and loop fastener. Affix bells by sewing them into the fabric. If you’re using large bells, a handful will do. If you’ve got smaller bells, use as many as sound good to you!
Finish by affixing the hook and loop fastener to the ends of your anklet. You can find numerous hook-and-loop fasteners with adhesive backs; but if it’s just not sticking to your fabric, go ahead and sew or glue it in place.
Of course, let your creativity flow by decorating your anklet however you please. Then get dancing!
Thumb Piano
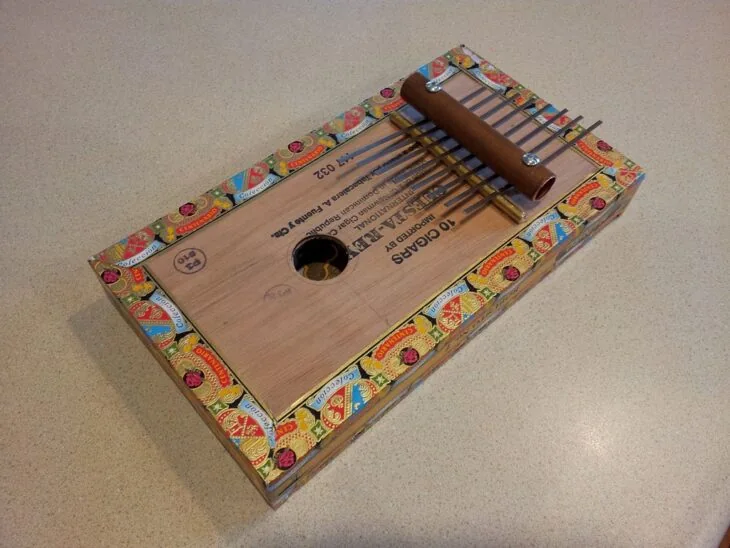
There are numerous ways to craft a rudimentary thumb piano like the ones found around Africa. For our purposes here, we’ll cover one way to make a thumb piano using scrap wood as the base.
The supplies needed for this are minimal: a small block of wood, a handful of bobby pins, and a staple gun with wood staples. (Plus art supplies, of course.)
Begin by smoothing out your block of wood with sandpaper, if it isn’t already. It should measure somewhere in the neighborhood of 3.5” X 5”.
Next, art up your block of wood! Paint is ideal in this instance.
Then, you’ll need to straighten out each bobby pin, and staple them uniformly (just one staple per pin) near the edge of the block in line. You may need to hammer in the staples to get everything as flat as possible.
To create differing pitches, add a staple to each pin at staggering lengths. The parts of the pins that stick out from the new staples should each be different, shorter to longer. Once again, you may need to hammer your staples down.
From here, simply bend the pins up slightly from the new staple. These are now the “tines” of the instrument. Play it by holding it in both hands, face up, tines pointed towards you as if you were going to hand the block to someone. Gently press and release the tines with your thumbs to produce a distinct buzzy tone.
If the sound is too twangy for your taste, you can add staples in between the edge and the end staple at which the tine is bent.
That’s a Wrap!
As you can see, some of these instruments are best built with (and for) the littles in your life while others could merit a regular rotation in your studio.
Ultimately, keeping your mind open to what sounds you can create with junk like used food cans, scraps of wood, and shipping materials can add a fun (and green) level of creativity and curiosity to your musical realm!